Hello Triangle
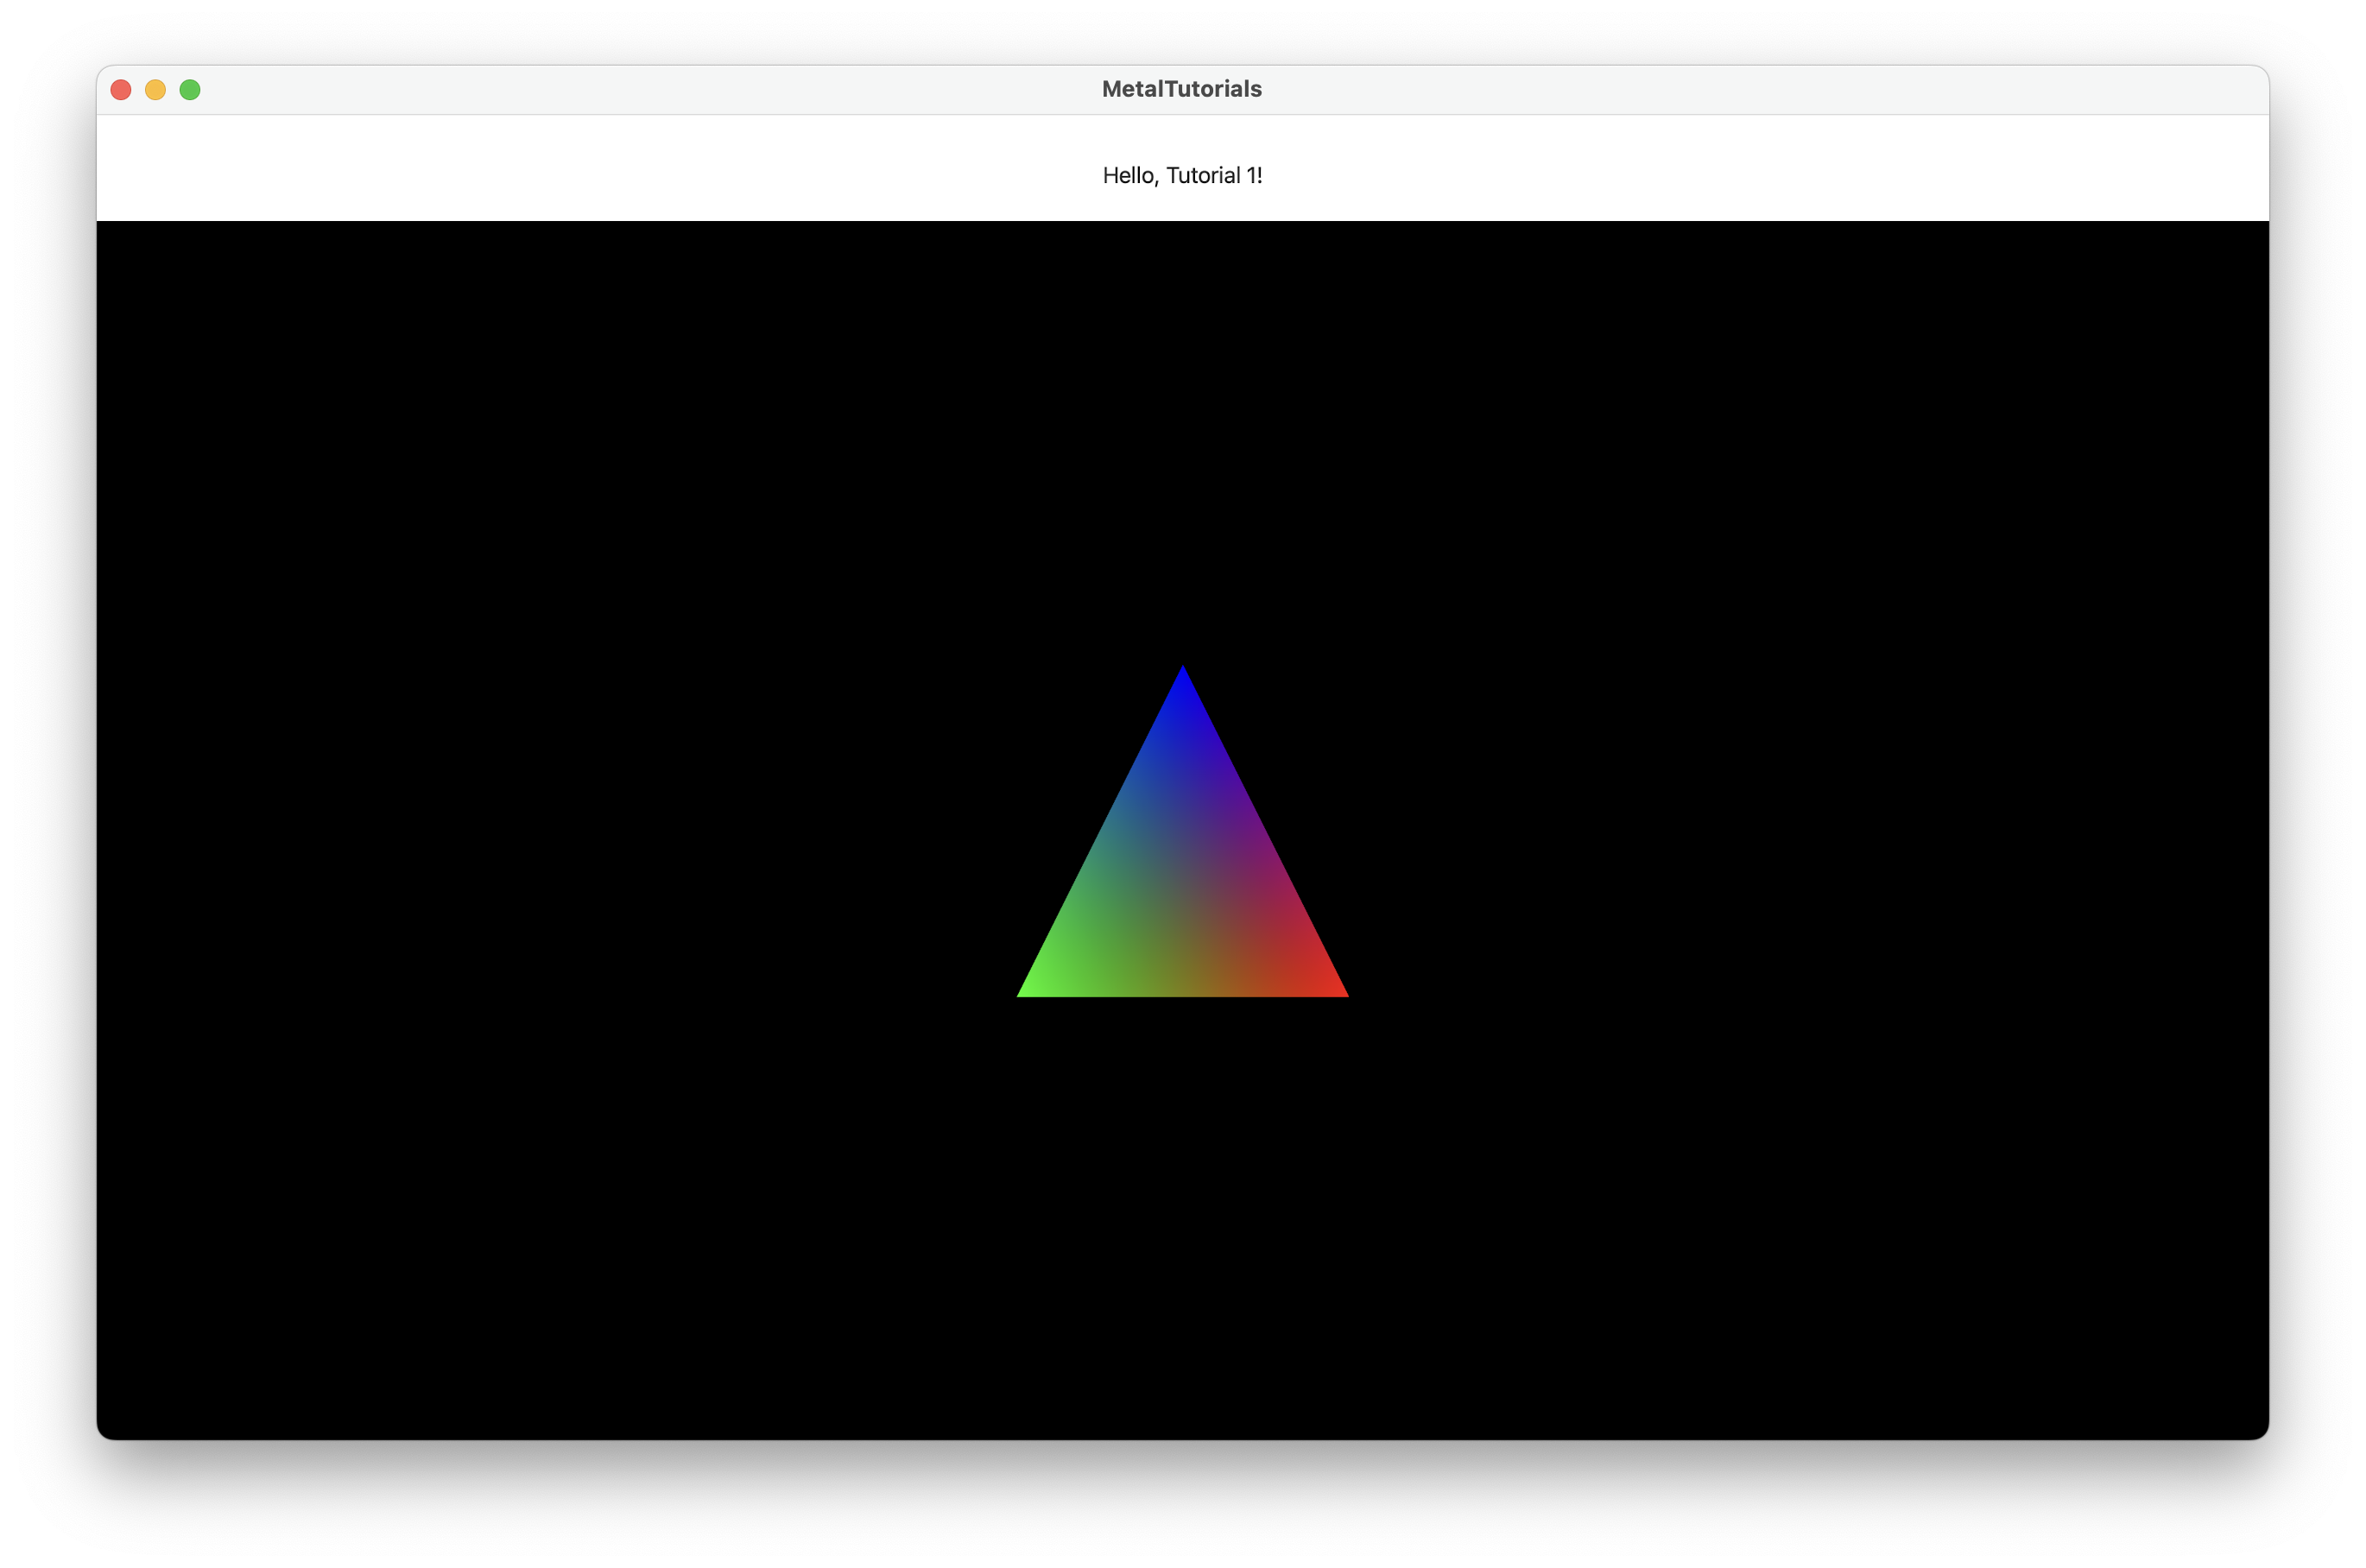
In this tutorial we render a single colored 2D triangle — the “Hello World” of graphics programming. By the end you will have a working Metal render loop and understand the objects every subsequent tutorial builds on:
- Obtain the GPU (
MTLDevice) and create a command queue - Compile a render pipeline from a vertex shader and a fragment shader
- Each frame: open a command buffer, encode a draw call, close the encoder
- Present the drawable to screen and commit
Prerequisite: Make sure you have completed Tutorial 0 — Preparation and can build and run the project.
⚙️ Setting up the project
In MTMetalTutorialsApp.swift set MT1ContentView() and run:
@main
struct MetalTutorialsApp: App {
    var body: some Scene {
        WindowGroup {
            // substitute here to choose the tutorial
            MT1ContentView()
        }
    }
}
🔗 Metal API in this tutorial
| Object | Docs | Scope | Role |
|---|---|---|---|
MTLDevice |
↗ | App lifetime | The GPU; factory for all Metal objects |
MTLCommandQueue |
↗ | Renderer lifetime | Ordered submission lane to the GPU |
MTLLibrary |
↗ | App lifetime | Archive of compiled .metal shaders |
MTLFunction |
↗ | Pipeline creation only | A single shader entry point |
MTLRenderPipelineDescriptor |
↗ | Creation only | Mutable config; compiled into an immutable state |
MTLRenderPipelineState |
↗ | Renderer/scene lifetime | Immutable compiled GPU program |
MTLCommandBuffer |
↗ | Per frame | One frame’s encoded command list |
MTLRenderPassDescriptor |
↗ | Per pass | Specifies render targets + load/store actions |
MTLRenderCommandEncoder |
↗ | Per render pass | Records draw calls into the command buffer |
MTLViewport |
↗ | Per encoder | Clip-space → window-space transform |
MTKView |
↗ | App lifetime | UIView subclass managing the CAMetalLayer |
MTKViewDelegate |
↗ | App lifetime | Protocol for draw(in:) callbacks |
👨💻 Code
GPU render pipeline
flowchart LR
    A["Vertex Buffer\n(triangleVertices)"] --> B["Vertex Shader\nMT1::VertexShader"]
    B --> C["Rasterization"]
    C --> D["Fragment Shader\nMT1::FragmentShader"]
    D --> E["Color Attachment\n(MTKView drawable)"]
The shared vertex struct — MT1Vertex.h
Both Swift and the Metal shader need to agree on what a vertex looks like. We define it in a C header included on both sides via the bridging header — a mechanism that makes C/C++ types visible to both Swift and Metal simultaneously, avoiding duplicate definitions:
typedef struct
{
    vector_float2 position;   // x, y in pixel space
    vector_float4 color;      // R, G, B, A  — all in [0, 1]

} MT1Vertex;
vector_float2/vector_float4— why Metal’s vector types instead of a Swift struct? GPU buffers must be tightly packed and aligned to boundaries the GPU hardware expects. Metal’svector_float2andvector_float4types (from<simd/simd.h>) guarantee the correct memory layout and alignment for GPU consumption. Swift’sSIMD2<Float>andSIMD4<Float>are equivalent — you can use them interchangeably; the C header usesvector_floatfor compatibility with the.metalfile, which uses MSL’s built-infloat2/float4types. Never use a plainstruct { float x; float y; }for GPU data — the compiler may insert padding that breaks the GPU’s memory reads.
struct MT1Vertex {
    var position: vector_float2  // 8 B, 8-byte aligned  → byte offset  0
    var color:    vector_float4  // 16 B, 16-byte aligned → byte offset 16
}                                // sizeof: 32 bytes  =  MSL expects 32 ✓
One vertex in memory — each cell = 4 bytes (one Float)
color lands on a 16-byte boundary. The GPU reads both fields from exactly the right offsets.Swift — MT1Simple2DTriangleMetalView.swift
MT1Simple2DTriangleMetalView is a UIViewRepresentable that embeds an MTKView into SwiftUI. The coordinator is both the renderer and the MTKViewDelegate:
/// the coordinator is our renderer that manages drawing on the metalview
func makeCoordinator() -> MTRenderer {
    return MTRenderer(metalView: mtkView)
}

func makeUIView(context: UIViewRepresentableContext<MT1Simple2DTriangleMetalView>) -> MTKView {
    mtkView.delegate = context.coordinator
1️⃣ Device and pipeline setup (inside MTRenderer.init)
guard let device = MTLCreateSystemDefaultDevice() else {
    fatalError( "Failed to get the system's default Metal device." )
}
mtkView.device = device
MTLDevice— the GPU abstraction.MTLCreateSystemDefaultDevice()returns the best available GPU for the current device. On Apple Silicon it is the unified-memory GPU shared by CPU and GPU; on Intel Macs it may be the discrete GPU.MTLDeviceis a protocol — the concrete implementation is private and hardware-specific. Every other Metal object (buffers, textures, pipeline states, command queues) is created from a device, so you should store it for the lifetime of the app. On multi-GPU Macs you can callMTLCopyAllDevices()to enumerate all GPUs.
We load the shader functions from the default Metal library and bind them to a pipeline descriptor:
let library = _device.makeDefaultLibrary()!

//create the vertex and fragment shaders
let vertexFunction = library.makeFunction(name: "MT1::VertexShader")
let fragmentFunction = library.makeFunction(name: "MT1::FragmentShader")
MTLLibrary— compiled shader archive.makeDefaultLibrary()opens the.metallibfile that Xcode compiled from all.metalfiles in the target. It is a dictionary of named functions. You can also create libraries from source strings at runtime (makeLibrary(source:options:)) or load a specific.metallibfile withmakeLibrary(URL:), but compiling from source at runtime is slow and should only be done in development.
MTLFunction— a handle to a single compiled shader entry point. It carries no GPU state itself; it’s just a reference used when assembling a pipeline descriptor. PrefermakeFunction(name:constantValues:)if you use Metal function constants for compile-time specialization.
With those functions in hand, we compile the pipeline — this is the expensive step that triggers GPU shader compilation, so we do it once at startup:
//create the pipeline we will run during draw
let rndPipStatDescriptor = MTLRenderPipelineDescriptor()
rndPipStatDescriptor.label = "Tutorial1 Simple Pipeline"
rndPipStatDescriptor.vertexFunction = vertexFunction
rndPipStatDescriptor.fragmentFunction = fragmentFunction
rndPipStatDescriptor.colorAttachments[0].pixelFormat = _metalView.colorPixelFormat
do {
    _pipelineState = try _device.makeRenderPipelineState(descriptor: rndPipStatDescriptor)
}
catch
{
    _pipelineState = nil
    print(error)
}
MTLRenderPipelineDescriptor— mutable pipeline configuration. Think of this as a form you fill in before “baking” a pipeline. It specifies: which vertex and fragment functions to use, the pixel format of each color attachment (must match the render pass), whether blending is enabled, the depth/stencil attachment format, and the sample count for MSAA. The descriptor is only needed during creation — discard it afterwards.
MTLRenderPipelineState— immutable compiled GPU program.makeRenderPipelineState(descriptor:)triggers shader compilation and link. This is the expensive step (up to tens of milliseconds on first call). Once compiled, the state is immutable and can be used from multiple threads simultaneously. Create all pipeline states at startup or scene load — never in the hot rendering path. If you have many variant pipelines (e.g., with/without alpha blending) create them all upfront.
With the pipeline compiled, we create the command queue — our persistent channel to the GPU that we’ll use every frame:
_commandQueue = _device.makeCommandQueue()
MTLCommandQueue— ordered submission lane. The command queue serialises command buffers to the GPU in submission order. It is thread-safe: you can callmakeCommandBuffer()from any thread. Most apps create one queue per renderer and keep it for the app lifetime. Creating a queue is cheap; prefer one queue per logical stream of work (e.g., one for rendering, one for asset-loading blits).What is a hardware command ring buffer? Deep inside the GPU’s command processor sits a fixed-size circular queue of slots — the ring buffer. When you call
commandBuffer.commit(), Metal hands the encoded commands to the driver, which copies a reference into the next free slot and advances the write pointer. The GPU’s execution unit reads from its own read pointer, processes each command buffer in order, marks that slot free, and advances. The write pointer chases the read pointer around the ring: if it catches up (all slots filled), the CPU stalls until the GPU frees one. This is the hardware reason Metal’s triple-buffering pattern exists — keeping at most 3 frames in-flight ensures the CPU stays a few frames ahead without ever filling the ring.
2️⃣ Drawing (func draw(in view: MTKView))
Every frame, MTKView calls draw(in:) on the delegate. The sequence is always the same:
sequenceDiagram
    participant MTKView
    participant CommandQueue as MTLCommandQueue
    participant CommandBuffer as MTLCommandBuffer
    participant Encoder as MTLRenderCommandEncoder
    participant GPU

    MTKView->>CommandQueue: makeCommandBuffer()
    CommandQueue->>CommandBuffer: (new buffer)
    CommandBuffer->>Encoder: makeRenderCommandEncoder(descriptor:)
    Encoder->>Encoder: setRenderPipelineState
    Encoder->>Encoder: setViewport
    Encoder->>Encoder: setVertexBytes (vertices, viewport)
    Encoder->>Encoder: drawPrimitives(triangle, 3)
    Encoder->>CommandBuffer: endEncoding()
    CommandBuffer->>MTKView: present(drawable)
    CommandBuffer->>GPU: commit()
The triangle vertices are defined in pixel space (origin at viewport center):
/// triangle definition 2D
let triangleVertices:[MT1Vertex] = [
        // 2D positions,                                     RGBA colors
    MT1Vertex(position:  vector_float2(250,  -250), color: vector_float4(1, 0, 0, 1 )),  // red,   bottom-right
    MT1Vertex(position: vector_float2(-250,  -250), color: vector_float4(0, 1, 0, 1 )),  // green, bottom-left
    MT1Vertex(position: vector_float2(   0,   250), color: vector_float4(0, 0, 1, 1 ))   // blue,  top-center
    ]
Colors as
float4(R, G, B, A)— all channels are in the range [0, 1].(1, 0, 0, 1)= fully opaque red;(0, 1, 0, 1)= green;(0, 0, 1, 1)= blue. The A (alpha) channel controls opacity: 1 = fully opaque, 0 = fully transparent. The GPU will interpolate these colors across the triangle surface — a vertex colored red and a vertex colored blue will produce a purple gradient where the rasterizer blends between them.
Then we create a command buffer and a render command encoder for the current pass:
/// create the new command buffer for this pass
let commandBuffer = _commandQueue.makeCommandBuffer()!
commandBuffer.label = "Tutorial1Commands"

if let passDesc = view.currentRenderPassDescriptor {

    let commandEncoder:MTLRenderCommandEncoder! = commandBuffer.makeRenderCommandEncoder(descriptor: passDesc)
    commandEncoder.label = "Tutorial1RenderCommandEncoder"
MTLCommandBuffer— one frame’s command list. A command buffer is a lightweight object (create one per frame). It holds a sequence of encoded passes — render, compute, and blit — that execute in order on the GPU. After callingcommit()the CPU cannot modify the buffer. You can add completion handlers (addCompletedHandler) to be notified when the GPU finishes, useful for CPU/GPU synchronisation and profiling. Labels (.label = …) appear verbatim in Xcode’s Metal Frame Debugger and GPU Frame Capture.
MTLRenderPassDescriptor— render targets + load/store policy.view.currentRenderPassDescriptorgives you a descriptor pre-wired to the MTKView’s drawable texture with.clearload action and.storestore action. For off-screen passes you create the descriptor manually and attach your ownMTLTextureobjects. TheloadActioncontrols what happens to the attachment at pass start (.clear,.load,.dontCare); thestoreActioncontrols whether the tile memory is written back to DRAM (.store,.dontCare,.memorylessStore). Choosing.dontCarewhere possible is critical for tile GPU performance — see Tutorial 5.
MTLRenderCommandEncoder— records draw calls. The encoder is the highest-frequency object in Metal — you create one per render pass per frame. All GPU state (pipeline state, vertex/fragment buffers, textures, viewports, scissor rects, depth stencil state) must be set before each draw call. State is “sticky” — it persists until you change it. The encoder is finalised withendEncoding(), after which you cannot add more commands to it.
With the encoder open, we set the viewport, bind the pipeline, upload the vertex data, and issue the draw call:
// init the MTLViewport from the metal library
let viewport = MTLViewport(originX: 0.0, originY: 0.0, width: Double(_viewportSize.x), height: Double(_viewportSize.y), znear: 0.0, zfar: 1.0)
commandEncoder.setViewport(viewport)
MTLViewport— clip space → window space. Maps Metal’s NDC cube (x,y ∈ [-1,1], z ∈ [0,1]) to pixel coordinates on the render target.znear/zfarremap the depth range; keep them at 0/1 unless you need a partial depth range. You can set multiple viewports for geometry-shader-style viewport selection viaMTLRenderCommandEncoder.setViewports(_:)and the[[viewport_array_index]]shader attribute.
commandEncoder.setRenderPipelineState(_pipelineState!)

commandEncoder.setVertexBytes(triangleVertices, length: MemoryLayout<MT1Vertex>.size*3 , index: 0 )

commandEncoder.setVertexBytes(&_viewportSize, length: MemoryLayout<vector_uint2>.size, index: 1)

// encode the draw call
commandEncoder.drawPrimitives(type: MTLPrimitiveType.triangle, vertexStart: 0, vertexCount: 3)

commandEncoder.endEncoding()
setVertexBytesvsMTLBuffersetVertexBytes(_:length:index:)copies data inline into the command buffer — convenient for tiny uniforms (< 4 KB, the Metal limit). For anything larger or reused across frames, allocate aMTLBufferwithdevice.makeBuffer(bytes:length:options:). AMTLBufferis a typed, page-aligned GPU allocation. On Apple Silicon its backing memory is part of the unified memory architecture (UMA): the CPU and GPU share the same physical DRAM, so a buffer with storage mode.sharedis directly readable and writable by both without any copy — the CPU writes tobuffer.contents()and the GPU reads the same physical bytes. On discrete GPUs (separate VRAM),.sharedbuffers live in system RAM and the GPU fetches them over PCIe, which is slower;.privatemoves them into VRAM but requires a blit to update. Apple’s Memory Management Best Practices guide covers the tradeoffs in depth. For frequently-updated uniform data on any platform, use a ring of 2–3 buffers (double/triple buffering) indexed by frame number to avoid stalling the CPU while the GPU reads the previous frame’s data.
The triangle is encoded. The last two calls schedule presentation and submit the work to the GPU:
let drawable:MTLDrawable! = view.currentDrawable
commandBuffer.present(drawable)
commandBuffer.commit()
present+commit— these two calls hand the finished frame to the display and the GPU respectively; understanding what each does (and why the order matters) is important.
present(_:)registers a presentation schedule on the command buffer: once the GPU finishes executing it, Metal will hand the drawable’sCAMetalLayertexture to the display system, which then waits for the next vertical sync (vsync) signal before swapping it onto the screen. No pixels change yet when you callpresent— it just attaches a “show this when done” instruction.
commit()submits the fully encoded command buffer to the GPU’s hardware ring buffer (see the MTLCommandQueue note above). Aftercommit()returns, the CPU is free to prepare the next frame immediately — the GPU runs concurrently. The presentation attached bypresent(_:)fires automatically when the GPU finishes, with no further CPU involvement.Order matters:
present(_:)must be called beforecommit(). Under the hood,presentattaches a scheduled handler to the command buffer; oncecommit()is called the buffer is sealed — any handler added after commit is silently ignored, meaning the drawable is never displayed. The mistake compiles and runs without crashing, but you’ll see a black screen or dropped frames.
Pixel Space → Clip Space: the NDC transform
The vertex shader maps pixel coordinates to Normalized Device Coordinates (NDC) with one division: clip.xy = pixel.xy / (viewportSize / 2). NDC is a coordinate system where the entire visible screen spans exactly [−1, +1] on both axes — regardless of the actual viewport size. The GPU clips any vertex whose NDC X or Y falls outside that range before rasterization; those triangles are trimmed at the boundary or discarded entirely.
Move the sliders to see exactly what the GPU receives — and what gets clipped.
= 250 ÷ 250
= 1.000 ✓ in NDC range → vertex rendered
GPU clips any vertex outside NDC [−1, +1] before rasterization:
Tutorial triangle at viewport 500 × 500 — all three vertices land exactly on the NDC boundary:
| vertex | pixel X | pixel Y | clip X | clip Y |
|---|---|---|---|---|
| V0 (red) | 250 | −250 | +1.000 | −1.000 |
| V1 (green) | −250 | −250 | −1.000 | −1.000 |
| V2 (blue) | 0 | 250 | 0.000 | +1.000 |
Drag pixel X above 250 to push V0 outside NDC — the dot turns red and the status flips to clipped.
🎸 Metal — MT1HelloShaders.metal
That’s the Swift side. Now let’s look at the two GPU programs in MT1HelloShaders.metal — one runs once per vertex, the other once per fragment.
RasterizerData — the link between vertex and fragment shader
The vertex and fragment shaders communicate through a struct. The rasterizer sits between them and interpolates its fields across the triangle surface before the fragment shader sees them:
/// Vertex shader outputs and fragment shader inputs
struct RasterizerData
{
    float4 position [[position]];   // ← clip-space position; read by the rasterizer
    float4 color;                   // ← user data passed through to the fragment shader
};
[[position]]is a special Metal attribute that marks which field carries the clip-space position. The rasterizer must know the position to figure out which screen pixels the triangle covers — this attribute tells it “here it is”. Every vertex shader must output exactly one field with[[position]]. The type is alwaysfloat4(a 4-component vector: x, y, z, w).
Vertex shader
The vertex shader runs once per vertex (3 times for a triangle). Each invocation handles one vertex, identified by [[vertex_id]]:
vertex RasterizerData
VertexShader(uint vertexID [[vertex_id]],
                constant MT1Vertex *vertices [[buffer(0)]],
                constant vector_uint2 *viewportSizePointer [[buffer(1)]])
{
    RasterizerData out;

    float2 pixelSpacePosition = vertices[vertexID].position.xy;

    vector_float2 viewportSize = vector_float2(*viewportSizePointer);

    out.position = vector_float4(0.0, 0.0, 0.0, 1.0);
    out.position.xy = pixelSpacePosition / (viewportSize / 2.0);

    out.color = vertices[vertexID].color;

    return out;
}
[[vertex_id]]— Metal automatically provides the index of the current vertex (0, 1, 2 for a three-vertex triangle). Use it to index into the vertex array:vertices[vertexID]. In a more advanced pipeline with an index buffer, this becomes the post-lookup index; for direct draws it’s sequential.
constant MT1Vertex *vertices [[buffer(0)]]—constantmeans “read-only data shared by all threads” (as opposed to per-thread private data).[[buffer(0)]]says “read from Metal buffer slot 0” — that slot number must match theindex: 0you pass tosetVertexBytes(...)on the Swift side. This is the entire CPU→GPU data bridge: Swift writes to slot N, MSL reads from[[buffer(N)]].
out.position = vector_float4(0, 0, 0, 1.0)— Whyw = 1? Metal (like all GPUs) works in homogeneous coordinates (4D). The GPU divides(x, y, z)bywto get the final NDC position. Settingw = 1means “no perspective division” — the x, y, z values go straight to NDC unchanged. In Tutorial 2, the projection matrix setswto a depth-dependent value, producing actual perspective foreshortening.
The
[[buffer(n)]]indices match exactly what we set on the command encoder:commandEncoder.setVertexBytes(triangleVertices, length: …, index: 0) // → [[buffer(0)]] commandEncoder.setVertexBytes(&_viewportSize, length: …, index: 1) // → [[buffer(1)]]
Fragment shader
After the vertex shader runs, the rasterizer takes over: it figures out which screen pixels the triangle covers and creates a fragment for each one. For each fragment it interpolates the vertex outputs (color in this case) based on how close the fragment is to each of the three vertices — a fragment exactly at vertex 0 gets V0’s color; a fragment at the center of the triangle gets an equal blend of all three.
fragment float4 FragmentShader(RasterizerData in [[stage_in]])
{
    return in.color;
}
[[stage_in]]marks the parameter that receives the interpolated vertex shader output for this fragment. Metal wires it up automatically — no buffer index needed. Thein.colorhere is not any single vertex’s color; it’s a weighted blend of all three vertex colors computed by the rasterizer using barycentric coordinates (weights that sum to 1 and describe how far the fragment is from each vertex).
📚 Key concepts recap
MTLDevice— the GPU handle.MTLCreateSystemDefaultDevice()selects the best GPU. Every other object is vended from this. Keep it for the app lifetime.MTLRenderPipelineState— immutable compiled GPU program (shaders + pixel format). Create once at startup or scene load, reuse every frame. Creation triggers shader compilation — never create in the render loop.MTLCommandQueue/MTLCommandBuffer— queue is long-lived; buffer is created per frame. The buffer records all passes (render, compute, blit) and is committed atomically to the GPU.MTLRenderCommandEncoder— records draw calls for one render pass. State (pipeline, buffers) is sticky within an encoder. Always end withendEncoding().setVertexBytes— inline path for small (< 4 KB) one-shot data. UseMTLBufferfor anything larger or reused across frames.- Pixel space → clip space — the vertex shader divides pixel coordinates by half the viewport size to get Metal’s [-1, 1] NDC clip space.
[[stage_in]]— Metal interpolates vertex shader outputs across the triangle; the fragment shader receives the result automatically via the rasterizer.